The fierce Viking warriors not only used their axes in brutal warfare to chop heads and shields, but also for everyday tedious tasks like chopping wood and meat. These multipurpose tools, heavily embedded with symbolism and culture, represent a monumental part of Viking history. But how did these skilled Norse warriors forge their mighty axes?
In this article, we’ll be shedding light on the mystery wrapped around the ancient Viking axe-making process. We’ll cover everything from finding the raw materials by the Vikings to their crafting techniques.
So, let’s go back in time, (793 to 1066 CE) to find out how did Vikings make their axes – their weapon of choice. We’ll also learn some interesting Viking axes facts about decoration, and what they symbolized in their culture.
Contents
Viking Axes Facts
The Viking axe has its roots deeply embedded in the history of the Norse people in the icy landscapes of Scandinavia, dating back to around the 8th century. These axes were initially designed for practical use in farming, as well as for crafting and combat. The rugged, versatile design of Viking axes made them a valuable asset in everyday life.
As the Viking Age progressed, so did the design and purpose of these axes. They evolved from simple agricultural tools to weapons of war. Viking blacksmiths adapted the axe’s design to suit both their battle and domestic needs.
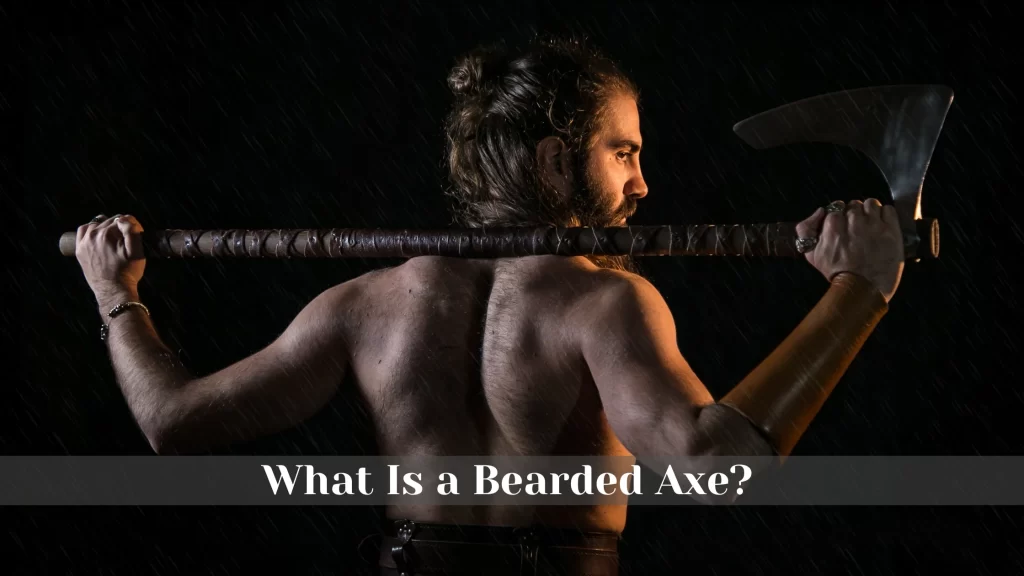
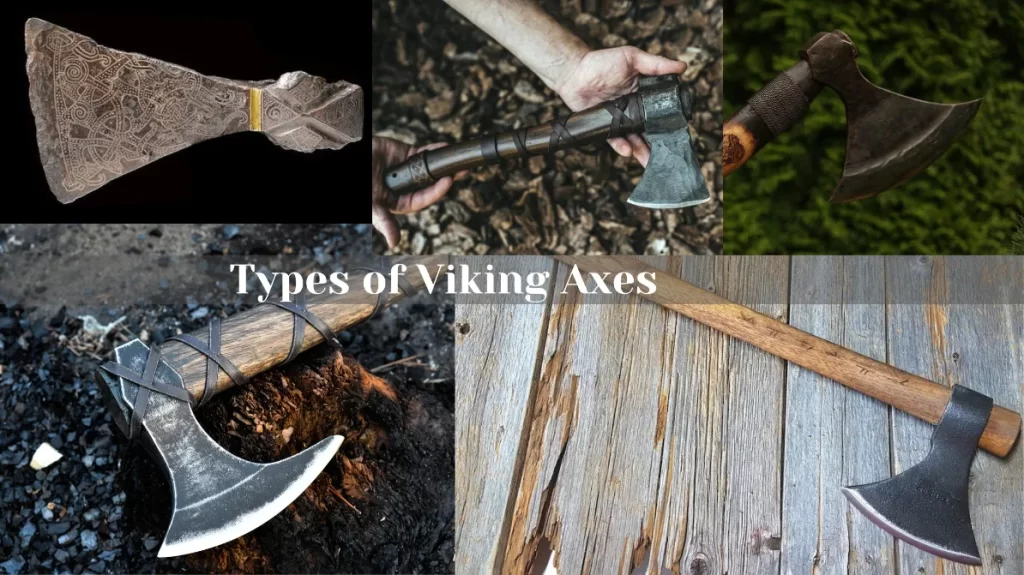
The early period Norse ax, or the “bearded axe”, was a multipurpose tool used by farmers for woodcutting. As the Viking era dawned, the axes transformed to showcase functional design tweaks and adaptations for warfare. Among these, the ‘Dane Axe’ was the most famous, notable for its slender, elegant blade and extended cutting edge.
As we dive deeper into understanding how Vikings made their axes, it is crucial to first grasp these understanding of the Viking axes history and evolution.
Curious to learn about valuable weapon of Norse people? Read about the most expensive Vikings weapon – and guess what? It was not an axe!
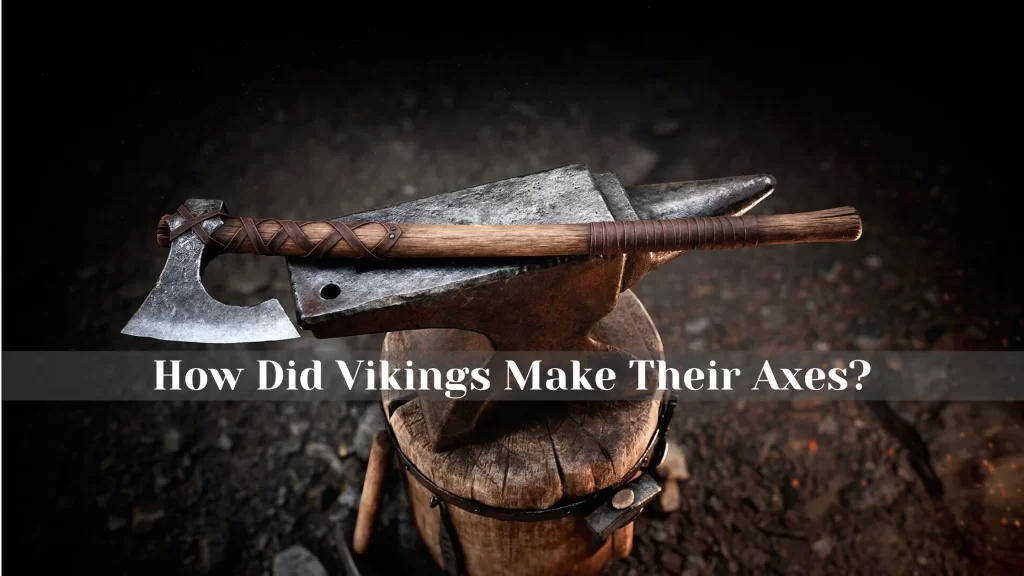
The Viking Axe Making Process
Forging a Viking was more than a mere technical process, it was a ritual that breathed life into both a tool and a weapon. Let’s dive deep into the depths of Viking blacksmithing and explore the step-by-step process that gave birth to these iconic axes.
Tools Used by Vikings to Forge Their Axes
According to historical and archaeological facts, the Norse Vikings used the following tools to forge their axes:
- Anvil: A heavy metal block with a flat surface and a horn-shaped projection, used as a base for hammering and shaping the metal.
- Hammer: A tool with a metal head and a wooden handle, used to strike and shape the metal on the anvil.
- Tongs: A tool with two arms and a hinge, used to grip and hold the hot metal.
- Chisel: A tool with a sharp metal edge and a wooden handle, used to cut and split the metal.
- Mandrel: A tool with a tapered metal rod, used to stretch and shape the eye of the axe head.
- File: A tool with a metal bar and teeth, used to smooth and refine the surface of the metal.
- Grinding Stone: A tool with a rotating abrasive wheel, used to sharpen and polish the edge of the blade.
- Furnace: A structure that produces high heat by burning fuel, used to heat up the metal for forging and hardening.
- Quenching Tank: A container filled with water or oil, used to cool down the metal quickly after heating.
Making the Viking Axe Head
Material Selection
The Vikings used iron as the main material for their axes, but they also added steel or bronze for the cutting edge or decoration. Iron was obtained from local sources of bog ore or imported from other regions. Steel was made by adding carbon to iron through carburization or case hardening. Bronze was made by alloying copper and tin.
Forging the Axe Head
The blacksmith heated the iron in the forge until it became shapable. Using a hammer, they shaped the heated metal into a rough outline of the desired axe head. Vikings also used welding technique to join two pieces of metal by heating them up and hammering them together, creating a stronger bond. The Vikings used this technique to attach a steel edge or a bronze decoration to the iron axe head.
Shaping the Axe Head
Working on the anvil, the Viking blacksmith carefully shaped the axe head by hammering, gradually refining its form and adding distinct features such as the blade and bevels.
Creating the Socket
Once the desired shape of the axe head was achieved, the blacksmith would then use a punch and drift to create a socket in the axe head for the haft.
Heat-Treating and Tempering
Once the shaping and socket was completed, the Viking blacksmiths used two heat-treating techniques to ensure strength and durability of the axe head, such as:
Hardening: A technique that involves heating up the metal to a high temperature (around 800°C) and quenching it in water or oil, making it harder but more brittle.
Tempering: A technique that involves heating up the metal to a lower temperature (around 200°C) and letting it cool down slowly, making it softer but more resilient.
Sharpening
The Vikings sharpened their axes by grinding and polishing the edge of the newly forged blade with a file or a grinding stone. Furthermore, they also applied wax or oil to protect the metal from rusting.
Making the Axe Haft (Handle)
The haft of a Viking axe, also known as the handle, was an essential part of the weapon because it provided the grip. The Vikings made their hafts from wood, usually ash, which was strong and flexible. They used different methods to make their hafts, depending on the type and size of the axe head. Here are some of the methods they used:
- Riving: This method involved splitting a log of wood along its grain with a wedge and a hammer, creating a rough shape of the haft. Then, the haft was trimmed and smoothed with a knife or an axe. This method was suitable for axes with smaller heads, such as bearded axes or francisca axes (throwing axes).
- Carving: Carved hafts were carved and shaped using a sharp hand axe, a knife or a chisel. This method was suitable for axes with larger heads, such as Danish axes or Mammen axes.
- Bending: This method involved soaking a piece of wood in water or steam, making it soft and pliable. Then, the wood was bent and twisted around a mandrel or a form, creating a curved shape of the haft. This method was suitable for axes with asymmetrical heads, such as cross axes or throwing axes.
Joining the Axe Head and Haft
After making the haft, the Vikings had to attach it to the axe head. They did this by inserting the eye of the head over the end of the haft and securing it with wedges or nails. They also wrapped leather or cord around the haft to improve the grip and comfort. Some hafts were also decorated with carvings, inlays, or metal.
Closest Video Guide to Make a Viking Axe
Now that you know how Vikings forged their axes. Also, read about what were Vikings axes used for in real.
The Role of Quenching in Axe Making
Quenching is a process that involves cooling down the metal quickly after heating it up. Quenching plays an important role in axe making, as it affects the properties and performance of the metal. Some of the benefits of quenching are:
Hardening
Quenching hardens the metal by transforming its structure from austenite to martensite. Martensite is a harder but more brittle form of iron than austenite. Quenching makes the metal more resistant to wear and tear, but also more prone to cracking or breaking.
Strengthening
The process of quenching strengthens the metal by creating internal stresses in its structure. These stresses make the metal more difficult to deform or bend, but also more likely to fracture or shatter.
Refining
Best of all, quenching refines the metal by reducing its grain size and removing impurities. Smaller grains make the metal more homogeneous and uniform, but also more susceptible to corrosion or oxidation.
Conclusion
In this article, we’ve peeled back the layers of history to uncover the secrets behind how did Vikings make their axes. From the materials and techniques they used, to the designs and decorations they applied. We’ve also learned about the ancient methods that Vikings used to shape, temper, and quench their axes.
Frequently Asked Questions
What were the main materials used by the Vikings to make their axes?
The main materials used by the Vikings to make their axes were iron, steel, and bronze. Iron was obtained from local sources of bog ore or imported from other regions. Steel was made by adding carbon to iron through carburization or case hardening. Bronze was made by alloying copper and tin.
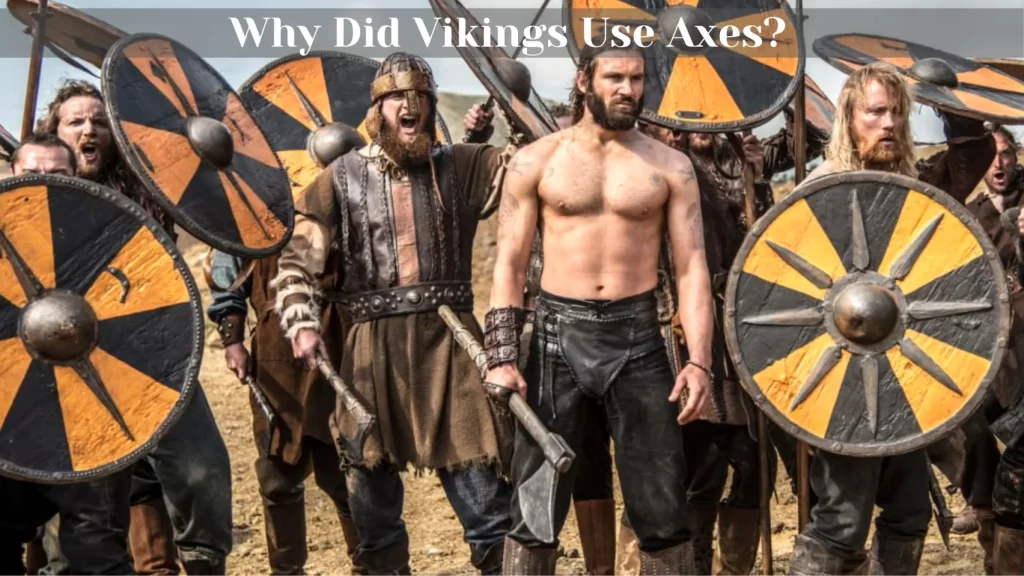
Why are Vikings associated with axes?
Vikings are associated with axes because axes were the most common weapon used by the Vikings and proved useful for both battle and everyday tasks. The simple design of the axe and its portability made the axe a signature weapon of the Vikings. Vikings of every social status owned and used axes. They have been recovered in hundreds of Viking graves. Norse sagas also provide evidence of the use of axes in battles throughout the Viking Age.
What are some of the techniques that Vikings used to shape their axe head?
Some of the techniques used to shape the axe head include forging, welding, and grinding.
How long did it take to craft a Viking axe?
Crafting a Viking axe was a complex process that could take several days to complete. This duration included the forging of the axe head, the crafting of the haft, and any decorative or ornamental work.
What is the legacy of Viking axe-making in modern times?
The legacy of Viking axe-making continues to captivate modern enthusiasts. Many individuals and artisans still craft Viking-style axes, preserving the traditions and artistry of these Norse historical weapons.