
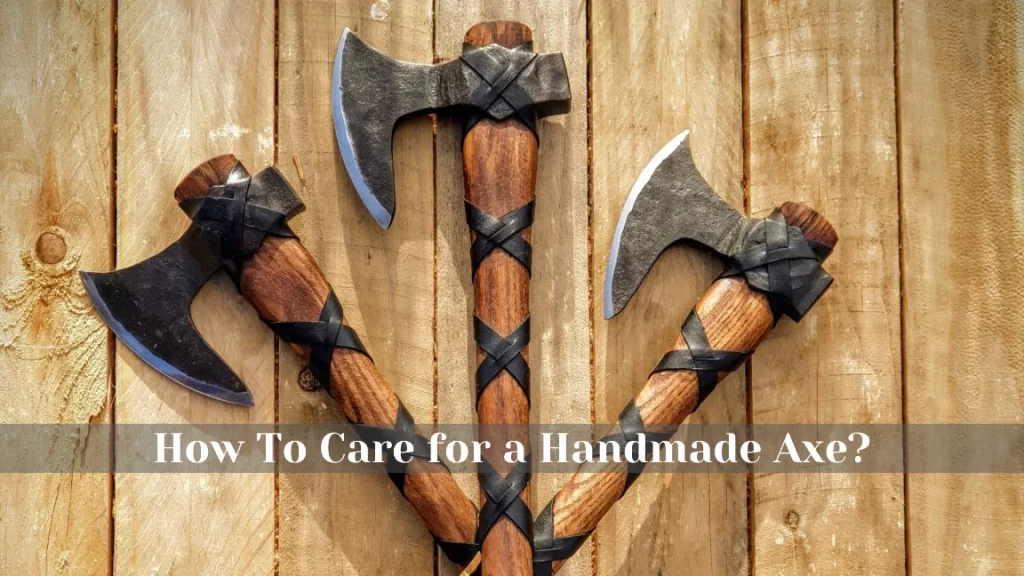
Since the dawn of humanity, axes have stood as symbols of strength, craftsmanship, and resilience. From the hands of cave dwellers to the Vikings of Norse, these tools have been instrumental in shaping our world, felling trees, clearing land, and forging civilizations. Today, handmade axes remain cherished heirlooms and passed down through generations.
While the form and function of axes have evolved over centuries, the fundamental principles of their care have remained largely unchanged. Whether you are a seasoned woodsman or a novice axe lover, understanding how to properly maintain your hand-forged axe is essential for preserving its performance, extending its lifespan, and ensuring its safety.
Here, we’ll guide you on how to care for a handmade axe properly, so that you can enjoy its performance and beauty for a long time. You will also learn about the importance of regular maintenance, the best practices for cleaning, oiling, and storing the axe.
Contents
- Understanding the Anatomy of a Handmade Axe
- The Importance of Handmade Axe Maintenance
- How Often and When to Perform Maintenance
- Guide to Care for a Handmade Axe
- How to Store Your Hand-Forged Axe Safely
- Importance of Axe Head Sheath for Storage
- Additional Tips for Maintaining Your Handmade Axe
- Wrapping Up
- Frequently Asked Questions
Understanding the Anatomy of a Handmade Axe
Before you learn how to care for a handmade axe, you need to understand the anatomy of a handmade axe. A handmade axe consists of three main components: the head, the handle, and the edge.
Each component has its own function, material, and design, and plays a vital role in ensuring the axe’s effectiveness and safety. Let’s take a closer look at each component and see what makes a handmade axe different from a factory-made one.
The Axe Head
Unveiling the Powerhouse
The head is the metal part of the axe that does the cutting. The head is usually made of high-carbon steel, which is a strong and durable material that can hold a sharp edge for a long time. Axe head is forged by a skilled smith, who shapes the metal with a hammer and an anvil, and then hardens and tempers it to achieve the desired hardness and toughness.
The head has two main parts: the eye and the bit. The eye is the hole where the handle is inserted, and the bit is the cutting edge of the axe. The shape, size, and weight of the head vary depending on the type and purpose of the axe, such as splitting, chopping, or carving – heavier axes excelling in felling trees and splitting logs, while lighter axes are better suited for delicate limbing tasks.
The Axe Handle
The Soul of the Axe
The axe handle, often overlooked, serves as the vital link between the wielder’s hands and the axe head’s power. Handmade axe handles are traditionally crafted from premium hardwoods, such as hickory, ash, rosewood, or maple, renowned for their strength, flexibility, and stability. These woods ensure that the handle can withstand the axe’s considerable force while remaining comfortable and secure in the user’s grip.
The handle’s design is equally critical, featuring a contoured shape that aligns perfectly with the natural grip of the hand. This ergonomic design minimizes fatigue and maximizes precision, allowing the user to wield the axe with both power and control.
Just like the head, the handle also has two main parts: the knob and the haft. The knob is the end of the handle that prevents the axe from slipping out of the user’s hand, and the haft is the main body of the handle that provides leverage and control.
The length and curvature of the handle vary depending on the type and style of the axe, such as felling, hatchet, tomahawk, or battle axe (like Viking axe).
The Axe Edge
Where the Magic Happens
The edge is the sharp part of the axe that does the actual cutting. The edge is usually made of the same high-carbon steel as the head, but it is ground and honed to a fine and smooth finish. A well-honed edge ensures that the axe effortlessly slices through wood, splitting logs with minimal effort and producing clean, splinter-free cuts.
Again, the edge also has two main parts: the bevel and the heel. The bevel is the angled part of the edge that determines the sharpness and durability of the axe, and the heel is the base part of the edge that supports the bevel and provides stability. The angle and width of the edge vary depending on the type and function of the axe, such as splitting, chopping, or carving.
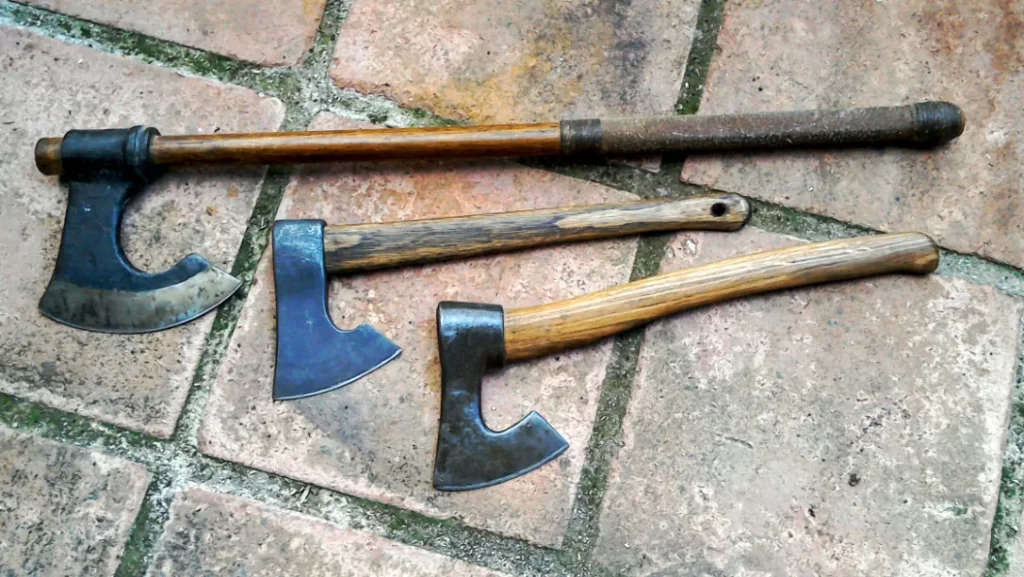
As you can see, a handmade axe is a complex and sophisticated tool that requires a lot of skill and craftsmanship to create. Each component of a handmade axe has its own significance and influence on the axe’s performance and quality. Therefore, it is important to care for each component properly and regularly, to ensure that your handmade axe remains in optimal condition.
The Importance of Handmade Axe Maintenance
Handmade axes are renowned for their durability, but even the finest steel and wood can deteriorate over time if not properly maintained. Maintenance is the key to extending the lifespan and improve performance of your hand forged axe. A well-maintained axe will not only cut better, but also look better, feel better, and last longer.
A poorly maintained axe, on the other hand, will not only lose its edge, but also risk damage, rust, and decay. Therefore, if you want to keep your handmade axe in optimal condition, you need to frequently care for your axe.
Here are 5 easy methods to remove rust from axe head.
How Often and When to Perform Maintenance
The frequency and timing of axe maintenance depend on several factors, such as the type and use of your axe, the condition and environment of your axe, and your personal preference and habit. However, as a general rule, you should perform axe maintenance at least once a year, preferably before or after the season of heavy use.
For example, if you use your axe for chopping firewood in the winter, you should maintain your axe before the winter starts, or after the winter ends. This way, you can ensure that your axe is ready and reliable for the season.
Required Tools for Axe Maintenance
To do this, you’ll require a few essential tools:
- A file or sharpening stone
- Mild soap and water or a specialized axe cleaner
- A dry cloth for drying
- A suitable oil or wax for protecting the head
Guide to Care for a Handmade Axe
Axe Head Maintenance Guide
The axe head, the heart of the axe, is where the cutting power resides. Ensuring its longevity and optimal performance requires care and attention, it needs to be kept clean, dry, and sharp. Here are some essential maintenance practices for axe heads that you should follow:
Step 1: Cleaning with Care
Regular cleaning is the cornerstone of axehead maintenance, preventing rust formation and debris buildup. After each use, thoroughly clean the axehead using a mild soap and water solution. Avoid harsh abrasive cleaners that could damage the delicate steel surface. If the axehead has become heavily soiled, consider using a specialized axe cleaner.
Begin by removing any dirt, sap, or other debris from the head. Soak the head in a container of warm, soapy water, using a soft brush or cloth to scrub away any stubborn residues. Be sure to avoid abrasive materials or harsh chemicals that may damage the head’s surface. After cleaning, rinse the head thoroughly and pat it dry.
Step 2: Drying
Moisture is the primary enemy of steel, leading to rust formation and compromising the axe’s integrity. After cleaning, you should dry your axe head thoroughly to prevent moisture retention and corrosion.
You can use a dry cloth to wipe any excess water from the axe head. Do not leave your axe head wet or damp, as this might cause rust or pitting on the metal surface.
Step 3: Oiling
Oiling your axe is a vital step in protecting the head from moisture and rust, as well as enhancing its appearance. Applying a thin layer of protective oil to the axehead creates a barrier that repels moisture and prevents rust. High-quality mineral oil, boiled linseed oi, or WD-40 are excellent choices for this purpose.
Apply the oil evenly, ensuring it penetrates the pores of the steel. Avoid using excessive oil, as it can attract dirt and debris. You should wipe off any excess oil with a dry cloth and let the oil soak into the metal for a few minutes.
Axe Handle Maintenance Guide
The axe handle, the bridge between the wielder’s hands and the axehead’s power, plays a crucial role in both safety and performance. A well-maintained handle ensures a secure grip, optimal control, and the prevention of accidents.
Here are some essential maintenance practices for axe handles that you should follow:
Step 1: Cleaning
You should always do regular cleaning of your handmade axe handle for preventing cracking and warping. After each use, wipe down the handle with a clean, damp cloth to remove dirt, debris, or sap. Avoid using harsh detergents or abrasive cleaners, as these can damage the wood.
Once cleaned, allow the handle to air dry completely. Avoid storing the axe in humid environments or exposing it to extreme temperatures, as these can contribute to warping and cracking.
Step 2: Repairing Minor Handle Damage
Over time, minor handle damage may occur, such as small cracks or loose wedges. It’s essential to address these issues promptly to prevent them from worsening.
Lightly sand the handle with fine-grit sandpaper to remove any rough spots and create a smooth surface for the oil to adhere to. If you notice a crack, you can carefully fill it with wood filler designed for outdoor use.
For loose wedges, remove the old one and secure a new wedge in place by tapping it gently with a mallet until the handle is firmly attached to the head. Properly securing the head is crucial not only for safety but also for maintaining the effectiveness of your axe.
Step 3: Applying a Protective Coating for Nourishment
To nourish the wood to renew it’s look and to protect it from the elements, it’s advisable to apply a protective coating. Boiled linseed oil, tung oil, or beeswax are excellent options for this purpose. These natural oils penetrate the wood, strengthening it and enhancing its resistance to moisture. They also add a beautiful sheen to the handle, enhancing its appearance.
Apply the oil sparingly to avoid excess buildup and ensure even coverage. Use a soft cloth or rag to apply the oil, working it into the pores of the wood. Allow it to dry completely before using the axe.
How to Store Your Hand-Forged Axe Safely
Like any fine tool, a handmade axe demands proper storage to preserve its beauty, functionality, and heirloom status. Neglecting storage can lead to rust formation, handle damage, and a diminished lifespan for this cherished possession. Here are some tips and recommendations on how to store your hand-forged axe safely:
Choose a dry and cool place to store your axe, such as a closet, a cabinet, or a shed. Avoid places that are humid, hot, or exposed to direct sunlight, as these can cause moisture, heat, or UV damage to your axe.
Use a wooden rack or a wall mount to hang your axe vertically, with the head facing up and the handle facing down. This will prevent the axe from bending, twisting, or falling, and will also allow air circulation around the axe. Do not store your axe horizontally, as this can put pressure on the handle and the head, and can also trap moisture and dust under the axe.
Use a leather sheath or a cloth cover to protect your axe head from dust, dirt, or scratches. Make sure the sheath or the cover is clean and dry, and fits snugly around the axe head. Do not use a plastic or metal sheath or cover, as these can trap moisture and cause rust or corrosion on the axe head.
Check your axe regularly for any signs of damage or deterioration, such as rust, cracks, or loose wedges. If you notice any problems, perform the necessary maintenance or repairs as soon as possible. Do not neglect your axe, as this can lead to serious issues that might compromise its functionality and safety.
Importance of Axe Head Sheath for Storage
An axe head sheath is a simple yet invaluable accessory for your hand-forged Viking axe. An axe sheath, far from being a mere accessory, plays a vital role in protecting your axehead, enhancing its appearance, and prolonging its lifespan. It can protect your axe head from dust, dirt, or scratches, and can also prevent accidental injuries or damage to other objects.
Furthermore, a sheath can also add some style and personality to your axe, as you can choose from different materials and designs that suit your taste and preference.
The most common and recommended material for an axe sheath is leather, as it is durable, flexible, and breathable. Leather can also be dyed, stamped, or carved to create various patterns and designs.
You can also use other materials, such as nylon, canvas, or metal, but make sure they are clean and dry, and fit snugly around the axe head. You can buy a ready-made sheath from a store or online, or you can make your own sheath with some simple tools and techniques.
How to Make Leather Sheath for Axe Head
Here are the basic steps for making a leather sheath:
- Measure the length and width of your axe head, and add some extra margin on each side for the seam and the flap.
- Cut out two pieces of leather with the same dimensions, and mark the outline of your axe head on one of them.
- Cut out the outline of your axe head from the leather piece, and use it as a template to cut out the same shape from the other piece.
- Stitch the two leather pieces together along the edge, leaving some space for the flap and the opening.
- Glue or stitch some snaps, buttons, or buckles to the flap and the opening, to secure the sheath around the axe head.
- Decorate your sheath with some dye, stamps, or carvings, of your choice.
Additional Tips for Maintaining Your Handmade Axe
While regular cleaning, oiling, and storage are essential, there are additional tips and precautions that can further safeguard your prized possession. By following these tips, you can prevent or solve some of the problems that might affect your axe’s performance and quality.
- Rust removal: Scrub off the rust with a wire brush, steel wool, or sandpaper. You can also use vinegar, lemon juice, or baking soda to dissolve the rust. Clean, dry, and oil your axe head afterwards.
- Handle replacement: Remove the old handle from the eye of the head. Insert the new handle into the eye of the head and secure it with wedges and glue. Shape and sand the handle to fit your hand and apply oil or wax to protect the wood.
- Preventing axe damage: Use your axe for its intended purpose and avoid chopping into hard materials. Avoid overstriking or throwing your axe. Use your axe with caution and respect.
- Regular inspection: Check your axe for rust, cracks, loose wedges, or dull edge. Check the balance and alignment of your axe. Perform maintenance or repairs as needed or take your axe to a professional.
Wrapping Up
In a world of mass production and disposable items, handmade axes stand as enduring symbols of craftsmanship, tradition, and the deep connection between man and the natural world. Today we have learned how to care for a handmade axe properly, and keep the ancient Viking weapon ready for action.
Regular cleaning, oiling, and proper storage are the cornerstones of axe maintenance. These simple yet essential practices protect the axehead from rust, the handle from cracking, and the overall integrity of the tool from deterioration.
Frequently Asked Questions
How often should I oil my axe?
As a general rule, apply oil to your axe at least once a month, or more often if you use it frequently or store it in a humid or hot place. You should also oil your axe after each use, especially if it gets wet or dirty.
What oil do you put on an axe?
You can put natural or synthetic oils that are suitable for metal and wood on your axe. For the metal part of the axe, you can use linseed oil, tung oil, mineral oil, or WD-40. For the wooden part of the axe, you can use boiled linseed oil, tung oil, or beeswax. You should avoid using vegetable oils, as they can go rancid and attract insects.