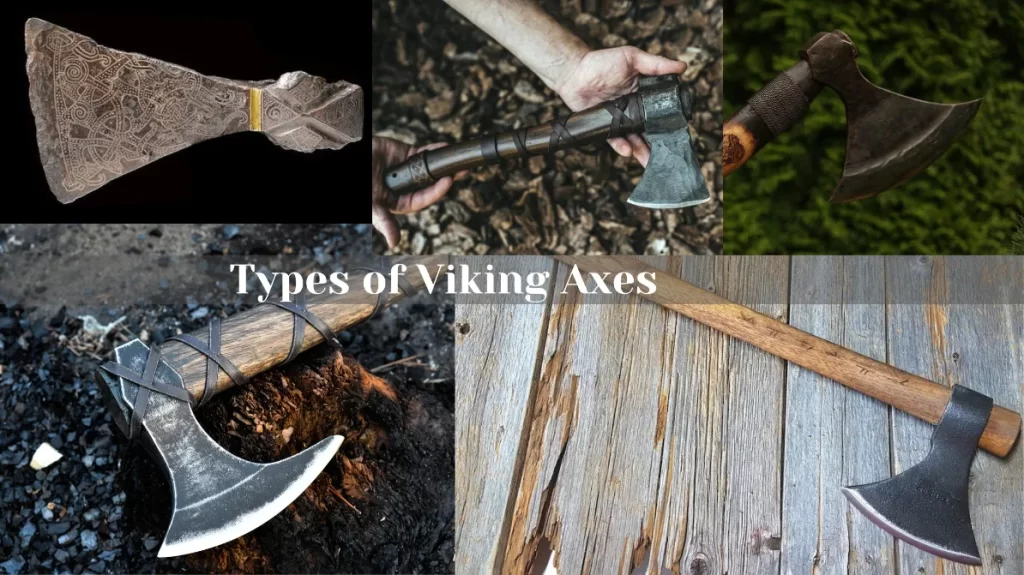
If you are a fan of Viking culture, history, or weapons, you might have a Viking axe or two in your collection. A Viking axe has a distinctive shape and design, and it can be used for various purposes, such as chopping wood, hunting, fighting, or throwing. However, no matter how you use your Viking axe, you need to keep it sharp.
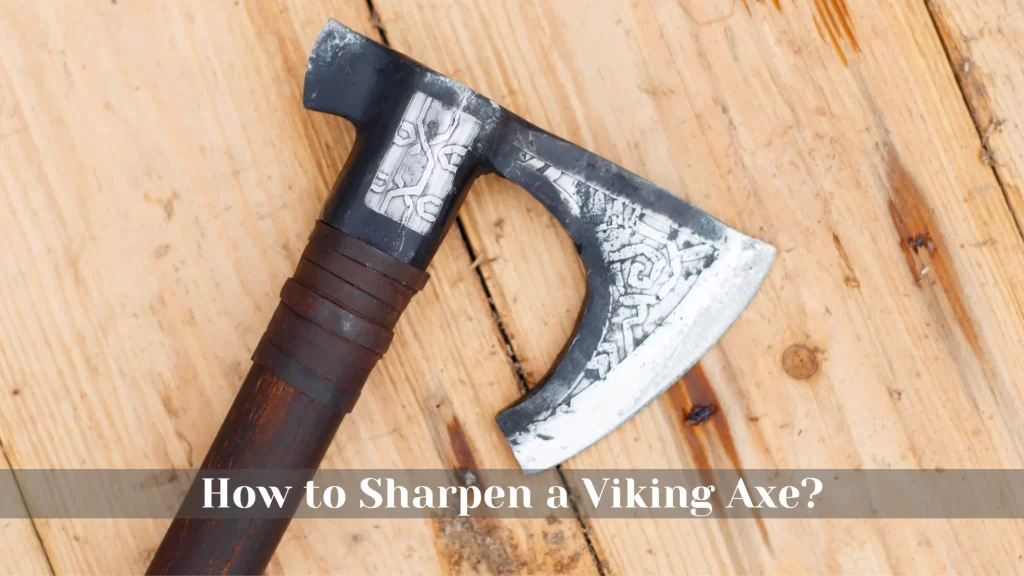
Sharpening an axe is not only necessary for maintaining its quality and appearance, but also for enhancing its performance, safety, and durability. A sharp axe can cut through materials more easily and efficiently, reduce the risk of accidents and injuries, and last longer than a dull one. A dull axe is more likely to slip or glance off of the target, which could lead to an injury.
In this article, we will discuss four main methods for sharpening an axe: using a file, using a whetstone, using a grinder, and using a rock (the Viking age Norsemen way). We will also provide tips and precautions for each method.
Note: You can use these axe sharpening methods to sharpen the blades of almost every type of hand forged axe, such as throwing axe, carving axe, bearded axe, Dane axe, and hatchet, etc.
Contents
Sharpen a Viking Axe with a Whetstone
Sharpening your axe with a whetstone is a time-honored technique, which was also used by ancient Norse Vikings. A whetstone is a fine-grained abrasive stone used to sharpen and polish the edges of cutting tools.
A whetstone comes in varying grit levels, which determine its coarseness or fineness. Whetstones work by removing small amounts of metal from the blade’s edge, effectively honing and polishing it.
Things Required
- A whetstone
- Water or oil to wet the whetstone
- A leather strop or cloth for finishing
- A flat and stable resurface
- Some oil or wax
Here are the necessary steps to sharpen your Viking axe using a whetstone:
Step 1. Wetting the Whetstone
Wet the whetstone with water or oil. Depending on the type of whetstone you have, you may need to soak it in water for a few minutes or apply some oil on its surface. If you are using a water stone, submerge it in water and let it soak for about 10-15 minutes. For an oil stone, apply a small amount of honing oil to the surface and spread it evenly.
Wetting the stone will reduce the friction between the stone and axe, thus increasing the effectiveness of the sharpening.
Step 2. Holding the Axe and Whetstone
With the axe firmly held in one hand and the whetstone in the other, start the sharpening process. The axe should be stable enough to prevent any accidental injuries or erroneous sharpening.
You can also place the whetstone on a flat and stable surface and hold the axe with both hands. Make sure that you have a firm and comfortable grip on both tools.
Step 3. Rubbing the Whetstone
Rub the whetstone along the edge of the axe in a circular motion. Start from the heel of the edge and move towards the toe. The circular motion will help you cover the entire edge and create a uniform and smooth edge.
The angle of the whetstone should be the same as the angle of the file, between 20 and 30 degrees. You should use the coarser side of the whetstone first, then switch to the finer side for polishing.
Step 4. Repeating on the Other Side
Once you have finished with one side, flip the axe and repeat the process on the other side. You should hone and polish both sides of the edge with the same angle and motion as before. This keeps the blade symmetrical and balanced to strengthen the axe’s cutting abilities.
Step 5. Checking the Sharpness
Always check the sharpness and burr of the edge periodically. A crisp burr, ridge, or a thin flap of metal on the opposite side to the one you sharpened indicates adequate sharpening. After using the whetstone, you should feel no burr or ridge on either side of the edge.
You can also test the sharpness of your axe by cutting some paper or wood shavings. If your axe cuts smoothly and easily, it is sharp enough.
Step 6. Finishing the Edge
Once both sides of the edge are perfectly sharpened to the desired level, finish the sharpening process by swabbing the axe’s edge with a leather strop or cloth. After that, apply some wax or oil on the blade – it will remove any dust or residue from the blade and protect it from moisture and rusting. Applying some blade wax also enhances the sharpness and give a glossy look.
Tips and Precautions for Using a Whetstone
Here are some tips and precautions you should consider while sharpening a Viking axe with a whetstone:
- Choose the right grit and shape of whetstone for your axe. The grit of a whetstone is measured by numbers, such as 1000, 2000, 4000, etc. The higher the number, the finer the grit. A combination stone with two different grits, such as 1000/4000, is a good choice for most axes, as it can provide both honing and polishing functions. The shape of a whetstone can be rectangular, oval, round, etc.
- Keep the whetstone flat and stable on a surface. If you place the whetstone on a surface, make sure that it does not move or wobble when you use it. You can also use a rubber mat, a towel, or some wood to secure it in place.
- Apply moderate pressure and speed on the whetstone. You do not need to press too hard or too fast on the whetstone, as this can damage your edge or your whetstone.
- Clean and dry your whetstone after each use. You should rinse your whetstone with water or wipe it with a cloth after each use, as dirt and metal particles can accumulate on its surface and reduce its effectiveness.
- Store your whetstone in a cool and dry place. Keep your whetstone away from direct sunlight, heat, or humidity, as these can damage its quality and performance.
Sharpen a Viking Axe with a File
It is the easiest way of sharpening an axe edge. A file is a hand tool with a series of sharp cutting ridges, known as teeth, which are used to remove metal or other hard substances. When applied to the axe’s dull edge, the file scrapes off tiny metal strips and removes a small amount of metal with each stroke, thereby sharpening the blade.
However, filing an axe also removes some material from the blade, so you should not do it too often or too aggressively.
Things Required
To sharpen a Viking axe with a file, you will need the following tools:
- A sturdy vise or stump
- A mill file suitable for axe-edge sharpening
- A pair of protective gloves
- Safety goggles
- Fine-grit sandpaper or a finer file for finishing
- A cloth for cleaning
- Some oil or grease
Here are the steps to sharpen a Viking axe with a file at home:
Step 1. Securing the Axe
Initially secure your axe either in a sturdy vise or on a stump to hold it steady during the sharpening process. It’s essential to ensure the firm hold of the axe to avoid any wobbling, which might result in imprecise filing.
Step 2. Choosing the Right File
Use a 10 to 12-inch long mill file for most axes. The file should be flat and coarse for removing a substantial amount of material quickly and efficiently. A single-cut bastard or mill file is a good choice for axe edge, as it has medium-sized teeth that can remove metal efficiently.
Step 3. Filing the Axe’s Edge
Firmly, but without forcing, slide the file across the axe’s edge in one direction – away from your body. Maintain a consistent angle, generally about 20 to 30 degrees depending on how sharp you want your axe to be. A lower angle will make your axe sharper, but also more fragile. A higher angle will make your axe more durable, but also less effective.
You should file the edge from the heel (the part near the handle) to the toe (the part far from the handle) in one direction only. Do not file back and forth, as this will create uneven and rough edges. Keep the file moving in a consistent direction along the blade’s edge, applying even pressure.
Step 4. Checking the Burr and Sharpness
After several strokes, check the edge of your axe. You should feel a slight burr or ridge on the side opposite to the one you filed. This burr is a good indicator that you’ve filed enough on that side. Beware not to file too much, or you can thin and weaken your axe’s edge.
You can also test the sharpness of your axe by cutting some paper or wood shavings. If your axe cuts smoothly and easily, it is sharp enough.
Flip the axe and repeat on the other side. You should file the other side of the edge with the same angle and direction as before.
Step 5. Smoothing the Edge
Smooth the edge with a finer file or sandpaper. After filing both sides of the edge, you should remove the burr and polish the edge with a finer file or sandpaper. This will make your edge smoother and sharper, as well as prevent rust and corrosion. You can use a fine or smooth file, or sandpaper with 400 to 600 grit.
Here are easy and DIY methods to remove rust from axe head.
Step 6. Apply Oil on the Blade
Once the axe edge is sharpened to the desired level, wipe the blade with a cloth or rag and apply some oil or grease. This will clean any dust or metal particles from the blade and protect it from moisture and oxidation.
Tips and Precautions for Using a File
Here are some tips and precautions for using a file to sharpen a Viking axe:
- Always wear gloves and eye protection when filing to shield your hands from sharp edges and prevent metal shavings from entering your eyes.
- It is essential to clean your file after each use. Wiping it with a clean cloth will eliminate metal shavings that can hinder its performance. Moreover, applying a little oil to the file will prevent rusting, thus prolonging its life.
- Avoid over-filing. Applying too much pressure or unnecessary extra strokes can lead to damaging the edge. The key is to use consistent, controlled strokes to reach the desired sharpness.
- Do not use a file to sharpen an axe that is very dull or damaged, as this can take too long and remove too much metal from the blade. You should use a grinder instead, which we will discuss further in the article.
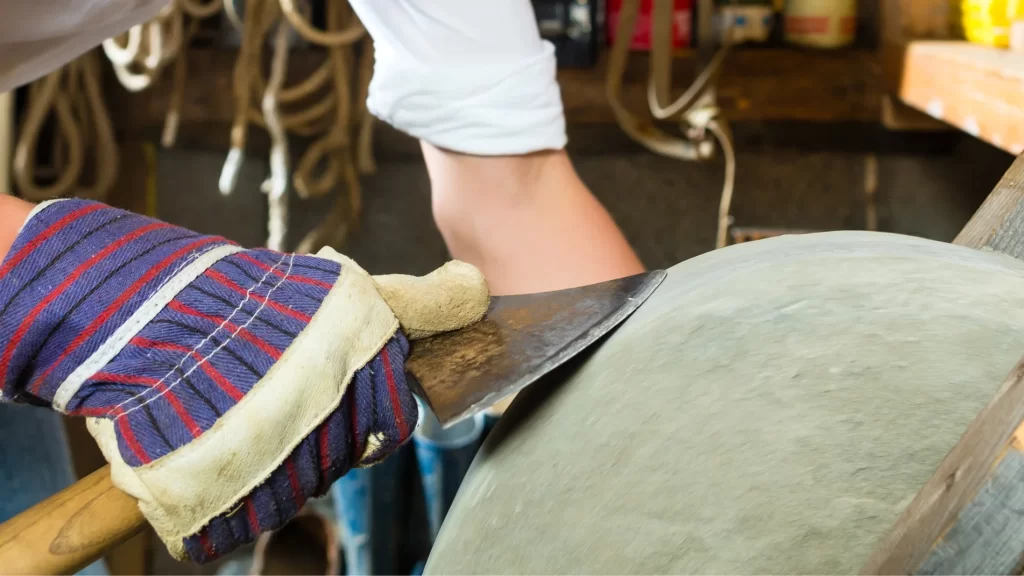
Sharpen an Axe with a Grinder
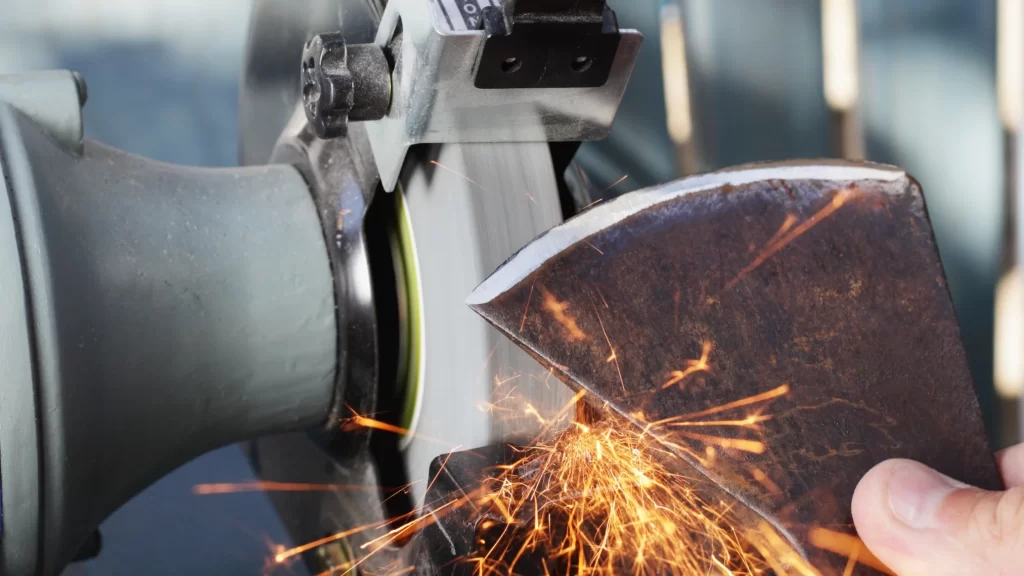
For those seeking a swift and efficient method to sharpen an axe, a grinder is the go-to choice. A grinder, often known as an angle grinder or bench grinder, is a power tool designed for shaping, sharpening, and polishing metal. It consists of a high-speed motor and an abrasive grinding wheel. When in operation, the grinder spins the wheel at high velocity, which, in turn, removes metal from the axe’s edge, creating a sharp and precise cutting surface.
However, grinding an axe also generates a lot of heat and sparks, which can affect the temper and quality of the steel. Grinders are very fast and efficient, but they can also be dangerous if not used properly.
Things Required
To sharpen an axe with a grinder, you will need the following tools:
- A grinder (preferably a bench grinder)
- A grinding wheel (preferably a coarse or medium grit wheel)
- A vise or a bench
- Some water or oil
- Safety glasses
- Gloves
- Ear protection (better to have)
- A file or whetstone for final finishing (optional)
Here are the steps to sharpen a Viking axe with a grinder:
Step 1. Position the Bench Grinder
Ensure the bench grinder is securely placed on a stable, flat surface, preferably on flat ground. A spinning grinder spins very fast and chances are it’ll move if not securely placed. That’s why, you should verify that it’s well-balanced and will remain steady during the sharpening process.
Step 2. Select the Right Grinding Wheel
Choose an appropriate grinding wheel for your axe. Opt for a coarser wheel for initial sharpening and a finer one for polishing. Ensure the grinding wheel matches the size and specifications of your bench grinder.
I prefer a medium-grit grinding wheel for sharpening axe blades because it can do both jobs – sharpening and polishing the edge.
Step 3. Start the Grinder
Once you are sitting in front of the grinder and ready to begin, turn on the grinder and set the speed and angle. The speed should be moderate, not too slow or too fast.
Step 4. Grinding the Edge
Now, you can start grinding the axe’s edge. Hold the axe with both hands and move the blade along the wheel with an angle between 20 to 45 degrees, depending on how sharp you want the blade. Ensure you apply light, steady strokes and avoid keeping the grinder at one spot for too long. Move the grinder along the length of the edge, maintaining a consistent angle to achieve a balanced and even sharpness.
Start from the back of the edge and move towards the front. The strokes should be short and smooth, not long and jerky. Do not press too hard on the wheel, as this can overheat or spark your edge.
Step 5. Checking the Sharpness and Heat
Frequently check the sharpness of the axe. Also, make sure you monitor the heat. If the edge becomes too hot, it can lose its temper and hardness, decreasing your axe’s longevity and efficiency. To prevent overheating, take small pauses and periodically dip the blade in water too cool it down.
Flip the axe and repeat on the other side. You should grind both sides of the edge with the same angle and motion as before. Make sure that both sides are symmetrical and even.
Step 6. Cooling the Edge
Once the axe edge is razor sharp and battle ready, stop grinding and cool it down by dipping in water or oil (I prefer water). This will prevent your edge from cracking or warping due to thermal shock.
Safety Tips and Precautions for Using a Grinder
Here are some tips and precautions for using a grinder to sharpen an axe:
- Wear gloves, eye protection, ear protection, and mask when grinding an axe, as metal filings, sparks, and noise can be harmful and dangerous.
- Avoid overheating or sparking your edge, as this can ruin your blade and make it more prone to cracking or chipping.
- Finish with a file or whetstone to smooth and polish your edge, as grinding alone can leave your edge rough and uneven.
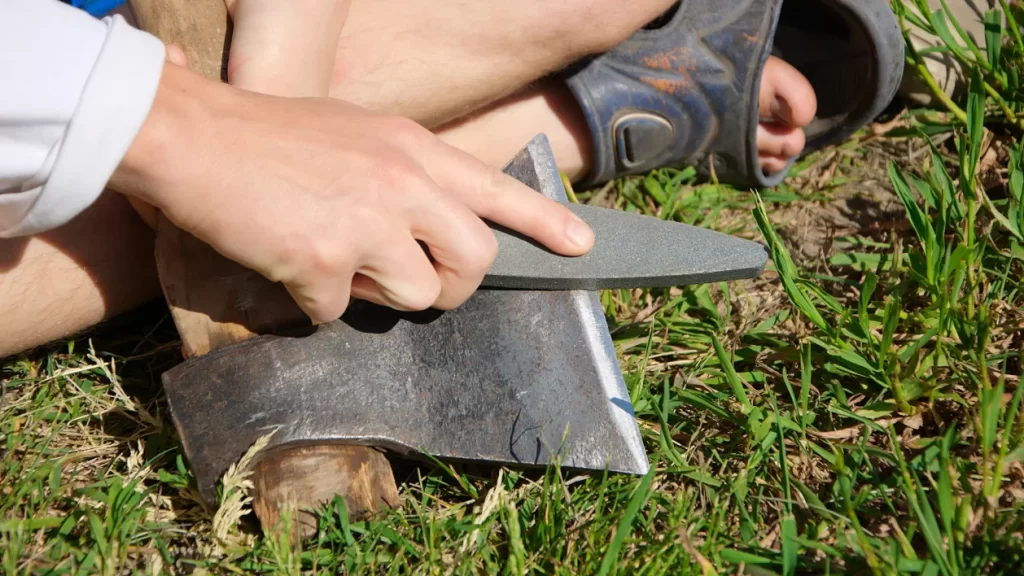
Sharpen an Axe with a Rock (The Ancient Viking Way)
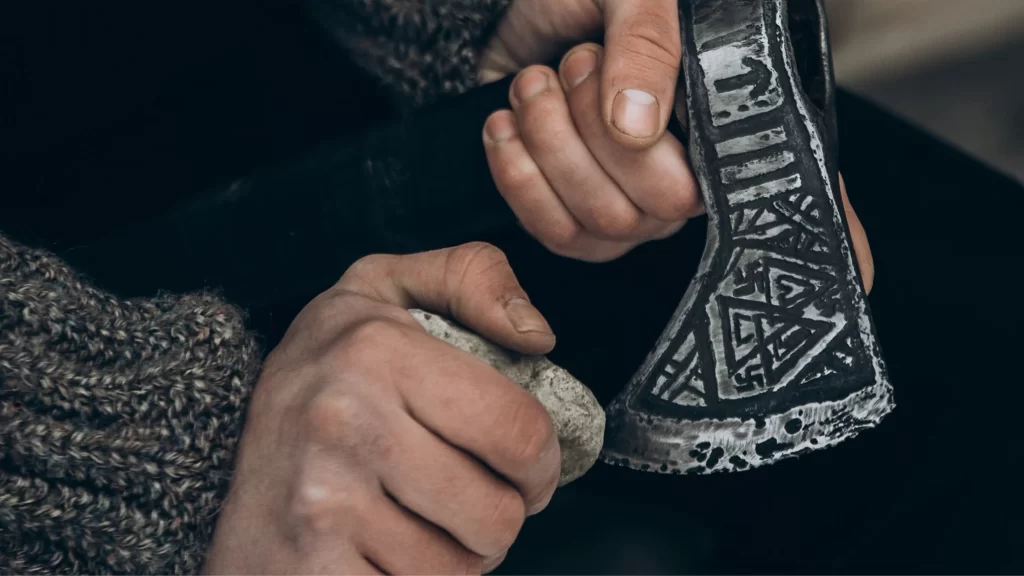
Sharpening an axe with a rock is a technique as old as time, notably utilized by the Vikings themselves. The ancient Vikings relied on their resourcefulness to maintain their weapons and Norse tools, and sharpening an axe with a rock was a skill passed down through the ages because they did not have access to file and grinder.
Usually, a smooth river rock is preferred for sharpening an axe. Why? These rocks have been naturally tumbled by water flow over centuries which gives them a flat, even surface ideal for honing metal edges. However, a rock can also scratch or chip your edge, so you have to be careful and gentle.
Things Required
- A hard, fine-grained smooth rock
- Water
- Oil or blade wax
Here are the steps to sharpen a Viking axe with a rock:
Step 1. Preparing the Rock
Ensure your chosen river rock is thoroughly wet before you start. Dip the rock in a container of water to help reduce the friction and prevent the axe from overheating while sharpening. This lubrication process also prevents clogging or scratching the axe edge.
Step 2. Secure the Axe
Due to the nature of this sharpening method, it generally involves holding the axe securely in your hand, rather than clamping it down. This method allows for easier manipulation of the axe against the rock. However, if the rock is large and you cannot hold it in your other hand, place it on the flat ground to rub the blade edge against it.
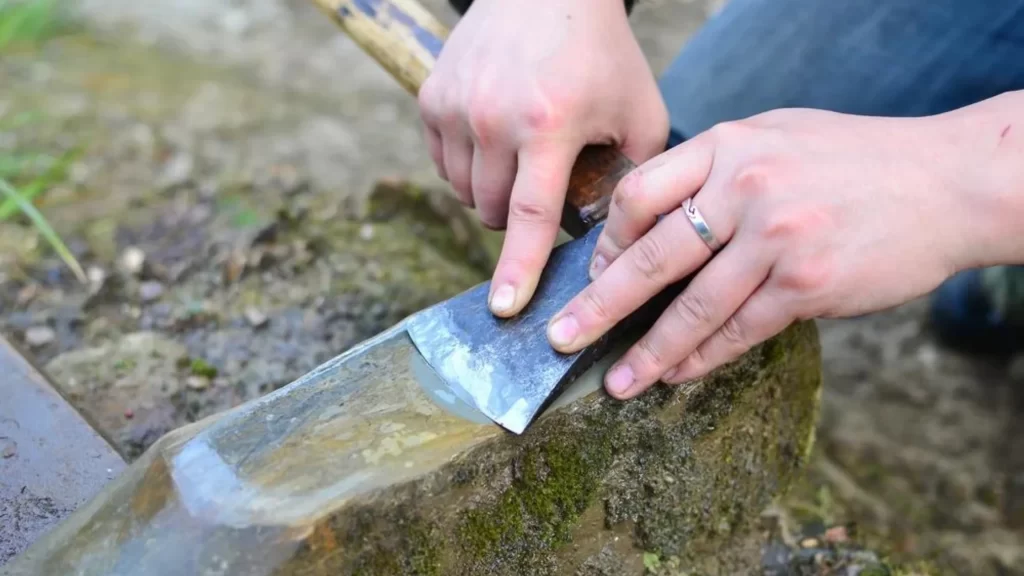
Step 3. Sharpening the Axe
Drag your axe against the wetted rock, maintaining the bevel angle (typically around 20-30 degrees, or up to 45 degrees, depending on the blade’s condition). This should be done in smooth, controlled motions, moving from the base of the axe towards the tip. Remember to use the light and long smooth strokes, rather than short and abrupt back and forth motions.
Step 4. Check the Sharpness
Once you’ve made several passes over the rock, take a moment to check the sharpness of the axe. You should be starting to notice a slight ‘burr’ on the other side of the edge, indicating that the axe is becoming sharp.
Step 5. Repeat on the Other Side
Flip the axe head and continue the process of sharpening the axe head edge. Also, keep checking for sharpness until both sides are symmetric and even, and you are satisfied with the final sharpness level.
Step 6. Final Touch
To prevent the iron or the blade from rusting, wipe the blade with a cloth or rag and apply some oil or blade wax. This will also clean any dust or residue from the blade and give a nice sheen to the edge. You can even strop the edge on a leather belt to polish the edge and remove any burrs.
Tips and Precautions for Using a Rock
- Select a fine-grained, smooth and abrasive rock for optimal results.
- Always keep the rock’s surface wet with water to prevent scratches and overheating and to ensure a smooth sharpening process.
- Consistency in the grinding angle is crucial for achieving a uniform edge.
- This method requires patience and time, as it may take longer compared to modern sharpening methods.
Wrapping Up
Knowing how to sharpen an axe is an essential skill for any Viking or modern-day axe user. A sharp axe is safer, more efficient, and more durable than a dull axe. There are four main methods for sharpening an axe: with a file, with a whetstone, with a grinder, and with a rock.
Files are simple and inexpensive to use, but they can be time-consuming. Whetstones are more abrasive and can produce a sharper edge, but they require more skill to use. Grinders are the fastest way to sharpen an axe, but they can also be dangerous if not used properly. Rock, again, simple and inexpensive but a time consuming and less efficient method.
Choose the method of sharpening an axe according to your resources and ease and follow our step by step guide to sharp the axe edge as new.
Frequently Asked Questions
What is the easiest way to sharpen an axe?
The easiest way to sharpen an axe is to use a file. Files are simple to use and inexpensive. They are also relatively forgiving, so it is difficult to damage the axe edge when using a file.
Is there a specific angle to sharpen a Viking axe?
While the exact angle may vary depending on the design of your axe, a typical sharpening angle for a Viking axe falls in the range of 20-30 degrees. However, it’s essential to adapt the angle to your specific axe design and the method you are using.
How often should I sharpen my Viking axe?
The frequency of sharpening your Viking axe depends on how often and intensively you use it. In general, it’s a good practice to sharpen your axe whenever you notice a decrease in cutting efficiency or a loss of sharpness. Regular maintenance can extend the life of your axe and ensure optimal performance.
Can I sharpen a rusty axe?
Yes, you can sharpen a rusty axe. However, you should first remove the rust from the blade before proceeding with the sharpening process. You can use a wire brush, sandpaper, or a rust-removing chemical to clean the axe head before sharpening.